How to Make a Swimbait a Line-Thru
Tennessee River guide and Costa FLW Series pro Jake Lawrence details how to turn your favorite swimbait into a line-thru to expand its range of applications
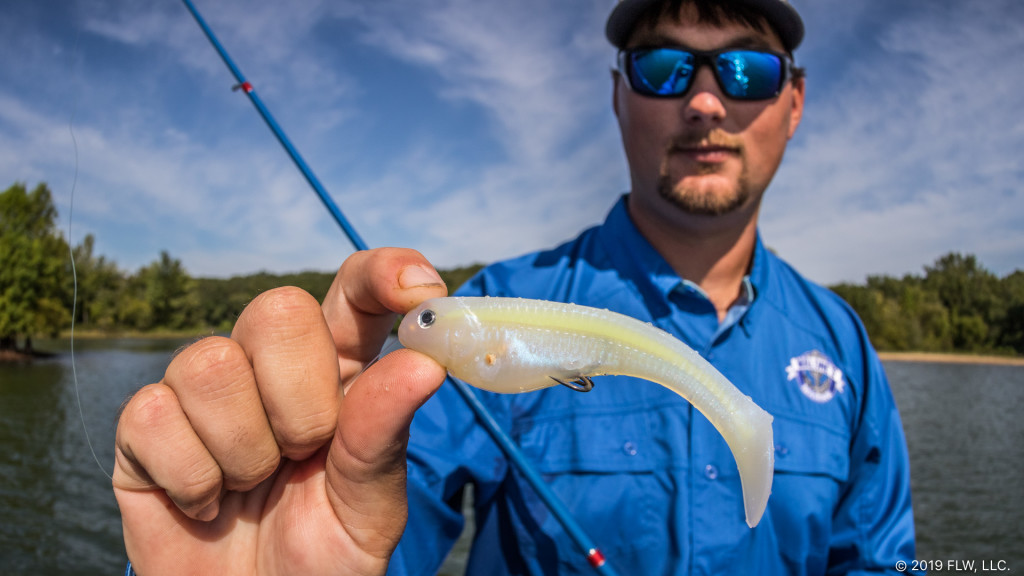
Jake Lawrence thinks the line-thru swimbait is more versatile than many tournament anglers realize. The Kentucky Lake and Pickwick guide and 2018 Costa FLW Series Lake Barkley champion frequently chucks one any time bass are shallow to not only put big fish in the boat, but to catch five good ones in a day.
To Lawrence, however, a line-thru isn’t just a type of swimbait to go out and buy. Thanks to the Fattube Line Thru Swimbait Tube and a lot of experimental rigging on his part, he’s able to convert his favorite “standard” swimbaits into line-thrus. It’s become an entire swimbait system that he’s refined for use throughout most of the tournament season.
The very basics
If you’ve never thrown a line-thru before, here are the basics:
- Most have solid soft-plastic bodies, where the line passes through the nose of the bait and out the belly.
- A treble hook is tied on and pricked into the underside of the swimbait.
- Most prerigged line-thrus come with internal weights that are carefully placed to keep the bait running upright, straight and true.
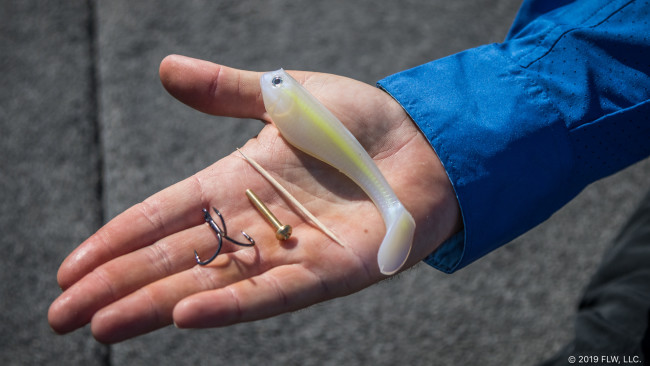
- Weight usually must be added to convert a standard swimbait to a linethru. The Fattube – a brass tube with a rim on one end – adds the weight and provides the tube through which the line is passed.
Where and when
While there are a few line-thru models weighted for fishing deep water, Lawrence says he usually reserves this swimbait style for when bass are in about 8 feet of water or less, and often fishes it close enough to the surface to see fish roll on it when they bite.
That doesn’t mean he’s strictly bank fishing.
“I’m fishing it offshore and on the bank, as long as it’s in 8 feet of water or less,” he says. “I just can’t keep that bait deep enough for anything deeper. About 6 or 7 feet is about as deep as I’ll keep it.”
The other factor is the exposed hook. A line-thru is a very “hangy bait,” says Lawrence.
“You cannot throw it around cover very well at all. If the fish are very loose around the cover and not tucked up against a log or inside a stake bed, like on a cloudy day or low-pressure day, and they’re aggressive and will come and get it, then I’ll throw it around cover. But generally this is an open-water type of technique. I’ve not found a weedless version of this system that will give you the same action in the swimbait.”
In Lawrence’s home region of the Tennessee Valley and west Tennessee, common target areas are channel-swing banks, lead-in banks in the mouths of spawning pockets, shallow flats, and shallow main-lake river bars or ledges. On highland lakes, it’s great around rock transitions and points. Lawrence will occasionally throw it around grass as long as it’s “really clean” grass that he can snap free of without gunking up the hook.
“During the shad spawn it’s a great way to catch them around boat docks, riprap and that sort of stuff,” he adds. “Essentially, any time they are feeding primarily on shad and there’s not a whole lot of cover around, I’ll experiment with it from the beginning of March or even February, through about the middle of May.”
After that, in Lawrence’s region, postspawn bass tend to push out to deeper offshore areas. They don’t start moving back shallow until about the middle of July. So from mid-summer through fall, he’ll break out the line-thrus again.
“Then these fish [on the Tennessee River] will leave the main river and go to shallow bars or get in the back of the bays. And I’ll pick it right back up.”
The late-summer and fall shallow-bar pattern is a frequent big-money winner in T-H Marine FLW Bass Fishing League events along the Tennessee River system of reservoirs, particularly on Kentucky Lake. With a big walking bait and one of these line-thrus, it’s possible to put some real giant gizzard shad eaters in the boat.

The action of the system
Line-thrus are often praised for the “free-sliding” hook setup, but that’s not specifically why Lawrence uses them.
“That line-thru gives the swimbait a totally different action,” he says. “There are a million swimbaits out there, and a lot of them are good. Take a Jenko 4-inch Booty Shaker; that is a great swimbait to fish on a jighead. It has a lot of great action. It catches them on a jighead. But you rig that on a line-thru, and it gives it a totally different action and look.
“What’s really cool about that line-thru, and I learn new things about it all the time, is each swimbait kind of has its own action when you rig it that way,” Lawrence adds. “A Keitech gets a lot of head wobble. That’s really what I’m getting when I change from a jighead over to this line-thru. You don’t have this huge weight over the head that basically guides that swimbait where it’s going. When you put the Fattube in it [to make it a line-thru], you’re giving freedom to that bait. It has secondary action. Not only does it have the paddle-tail action, but now it’s also got that head wobble that’s unique, and something you don’t get with a jighead.”
In Lawrence’s opinion, the difference can be substantial in clear water (he says his home lakes are continuously clearing up, making the line-thru a bigger factor) and around pressured fish that have been bombarded with every swimbait on the market.
“I’ve got enough confidence in this bait that once I get a bite or two on it, I’ll pretty much lock it in my hand,” Lawrence says. “I feel like if I can get this around fish they’ll bite it.”
Favorite swimbaits
Pre-rigged line-thrus such as the Scottsboro Tackle Co. Line Through and Optimum Boom Boom Line Thru are great options if you don’t want to bother tinkering with terminal tackle. You can buy them off the shelf and go catch fish. Lawrence prefers the versatility of carrying a few standard swimbaits that he can rig several ways based on the situation.
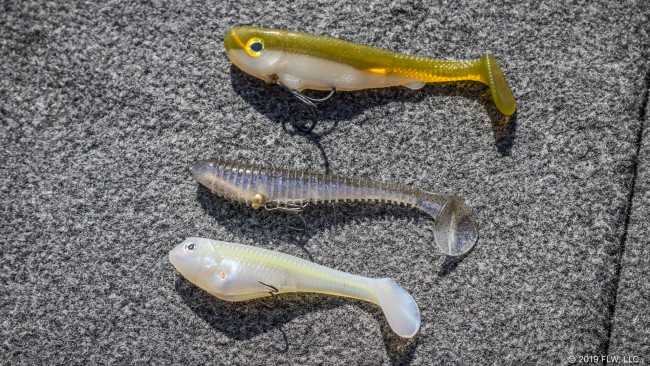
The swimbaits he most commonly rigs himself are the solid-bodied Jenko Booty Shaker, Scottsboro Tackle Co. Swimbait (technically a hollow swimbait) and Keitech Swing Impact FAT, though he’s experimented with several others, including some older Ignite baits (shown top in this photo). Hollow paddle tails like the Zoom Swimmer and Basstrix are difficult to rig consistently with the Fattube, so Lawrence reserves those for other scenarios.
Experimentation
Lawrence’s best advice for figuring out all the subtleties of the line-thru rigging style is to avoid trying to rig every swimbait in every size. Just pick three swimbait variations you’re confident in, and tweak the terminal tackle until it’s just right.
The construction of the swimbait, its size, the weight of the Fattube used and other factors all dictate the action and running depth. Lawrence has spent hours tinkering, experimenting with new terminal tackle and trying to get more performance from his baits. In fact, in the course of working on this article, he changed his split ring preference (now opting more often to not use one to connect the hook) and discovered a new treble hook (more on it later) that helps reduce snags.
Generally, the first step is to figure out what size Fattube is needed to balance out each size of your chosen swimbaits to get it to run right.
“The lighter the weight, the more of that head-wobble action you’re going to get,” Lawrence says. “But the fatter or bulkier that swimbait is, the more you’ll have to adjust because if it has a really fat head, that causes the bait to rise. A Jenko 4.0 Booty Shaker has a really big, bulky head on it. To make that run in the 1- to 3-foot range, I’ve got to use a 1/4-ounce Fattube on it. If I use a 4.8 Keitech, I use a 1/8-ounce Fattube.
“Where I primarily throw that Jenko Booty Shaker is when I want to fish really shallow. A lot of times, later in the fall, when they have seen a million Evergreen SB 125s and a million Sexy Dawgs, you can go right behind somebody that’s throwing topwater ultra-shallow on bars that are 1 foot or less and throw the Booty Shaker and catch them.”
The Scottsboro and Keitech, which have narrower heads and mouths, like to run a little deeper. Also, the Keitech has a more subtle action (but still with head wobble) than the wide-wobbling Booty Shaker, so Lawrence reserves the Keitech for situations when he needs a little more finesse.
If you’re trying to incorporate smaller swimbaits, you might also have to consider the length of the Fattube. If it runs too far back into a swimbait, the tube can limit the action. There’s a weightless plastic version that can work, or you can use a pop rivet in its place. In that case it’s probably necessary to add small nail weights into the belly of the swimbait to help keep it stable during the retrieve. Again, experimentation is the only way to figure it out.
Rigging the Fattube
To rig the Fattube, the No. 1 tip is to keep the bait perfectly straight. The steps depends on the specifics of the swimbait.
Here’s Lawrence’s method for rigging a 4.0 Booty Shaker:
1. Rest the swimbait on its side, and align the Fattube on the outside. The large end should be under the belly. Lawrence likes the small end to stay inside the plastic and remain about 1/16 to 1/8 inch shy of protruding out the nose. Use your thumb or some other means to mark where it needs to be inserted into the belly to wind up in the right place. This is pretty easy on the Booty Shaker because of its open underside, which is flanked by two “belly flaps” that hang down. The Fattube should rest under the belly inside those flaps. On other swimbaits, nailing the entry point is critical.
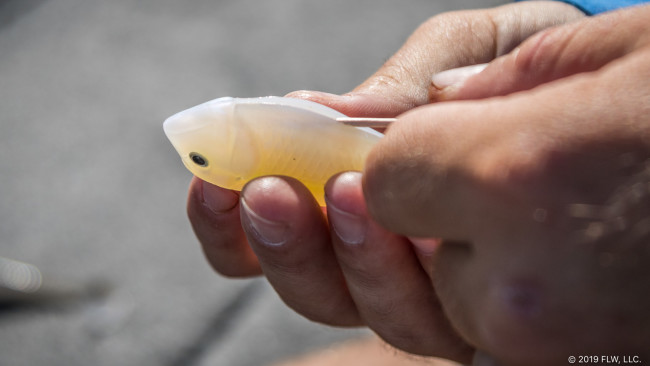
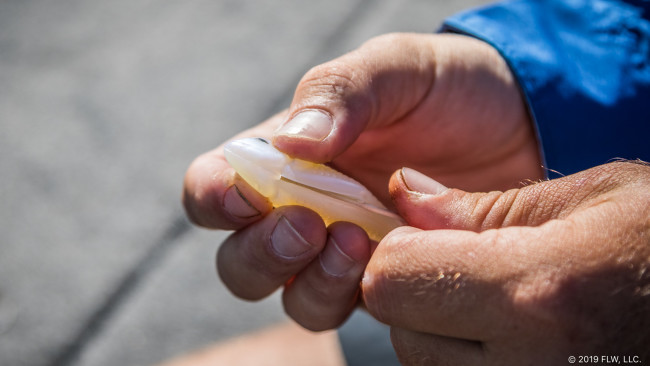
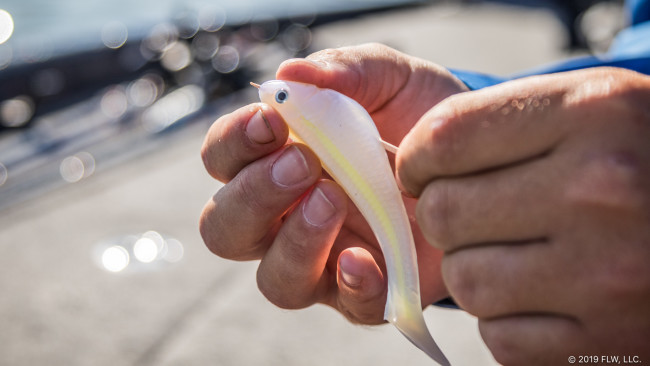
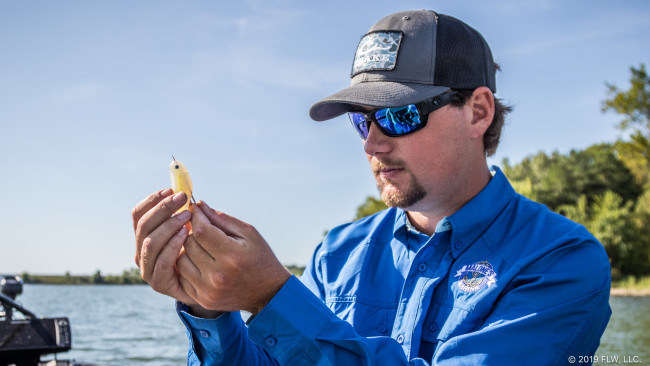
2. Run a toothpick through the swimbait from the point you marked on the belly out the center of the bait’s nose. You could also use a stiff metal wire. The key is to work very slowly to make sure the toothpick travels in a perfectly straight line through the bait’s body. If you bend the bait, it will stay kinked, and the rigged swimbait could swim off line or roll. If you get off line with the toothpick, back out and redirect so everything stays straight. Lawrence goes a little at a time and eyeballs the bait to make sure he gets it just right.
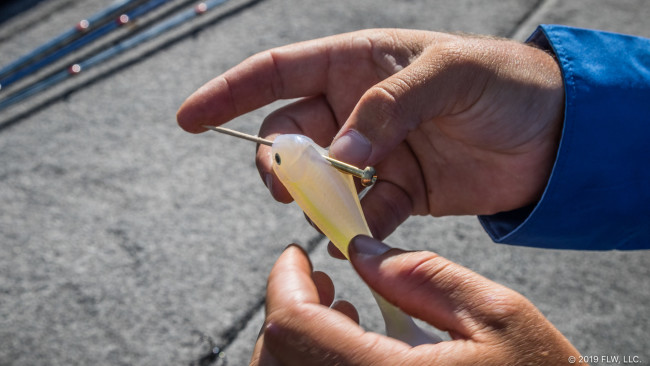
3. Leave the toothpick in place, and line up the Fattube on the rear point.
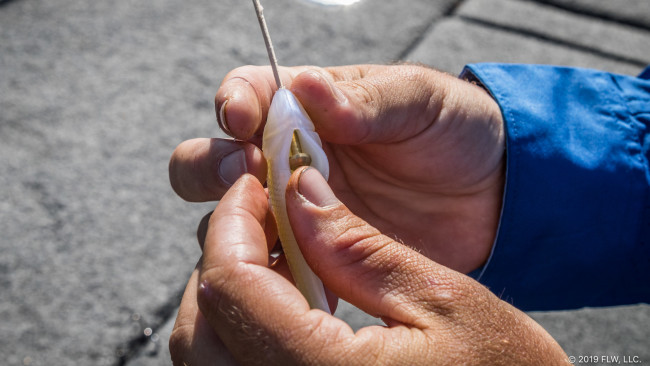
4. Push the Fattube through the plastic, following the toothpick. You can then remove the toothpick. With some swimbaits, the only remaining steps would be to run the line through the tube and tie on a hook, but Lawrence does a couple extra steps with the Booty Shaker because of its open underside.
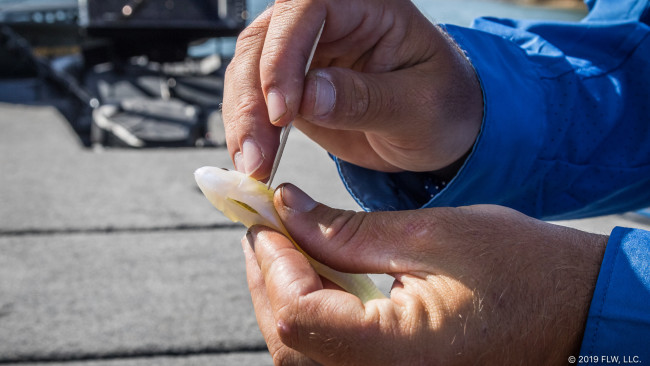
5. Squeeze the side flaps toward the center. They don’t need to touch, but should close up slightly to hold the Fattube in place. Run a toothpick through the side flaps so it skims across the Fattube. Depending on the size Fattube and swimbait you’re using, you might be able to get away with just one toothpick. Others might require two. If you can get the toothpick to pass right in front of the Fattube’s rim, even better. The toothpick keeps everything together in place.
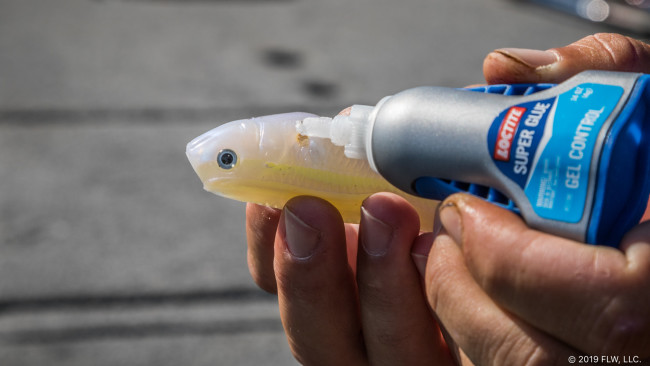
6. Cut off the excess toothpick material, leaving just a hair extending out the sides, and put a drop of glue on each end of the toothpick.
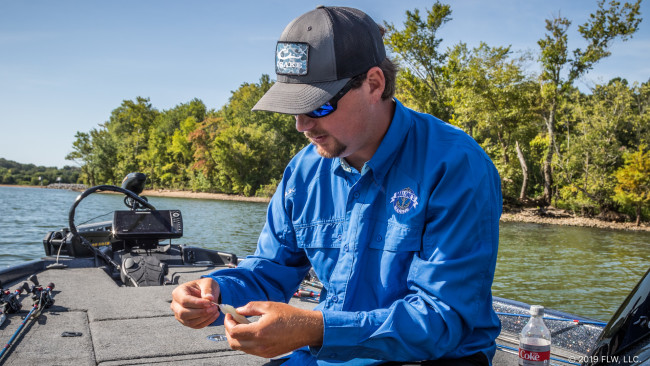
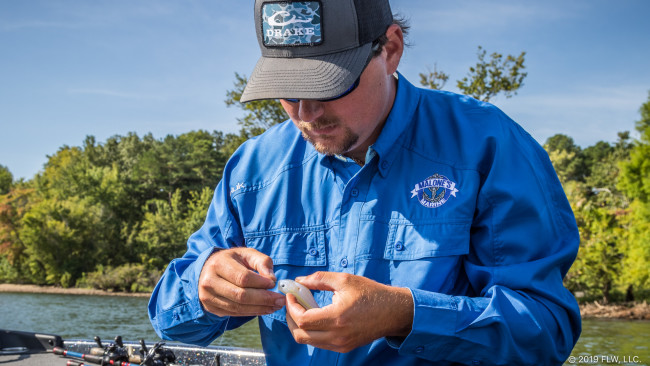
7. Feeding the line through the nose can be a frustrating part. It might help to widen the hole in the nose plastic just a hair by “drilling” a little with a toothpick. Then slip the line into the nose, through the Fattube and out the belly.
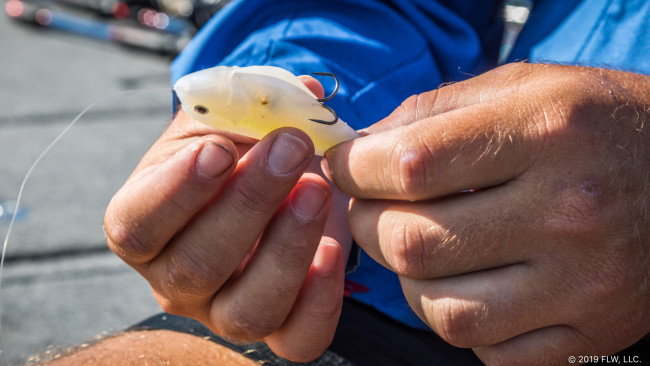
8. Tie on the appropriate treble hook and you’re done.
A few rigging notes:
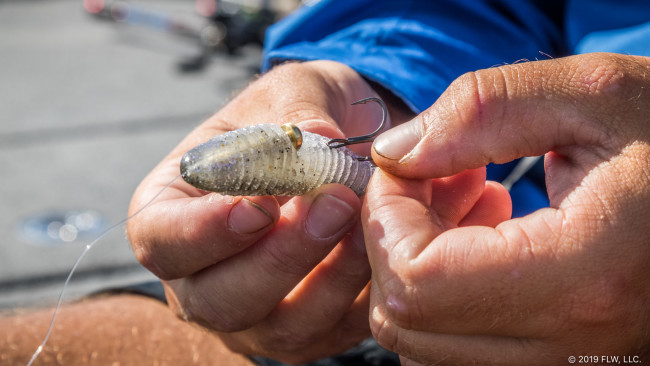
1. Watch your back angle – On some swimbaits, such as the Keitech, the “rim” of the Fattube will press against the belly and impart an arch in the bait’s back (see No. 2 for more on this). It’s better to start in “neutral” with a straight back. To get there, press the Fattube rim up into the plastic (it’ll cut in just a tad) to relieve the tension and straighten the bait.
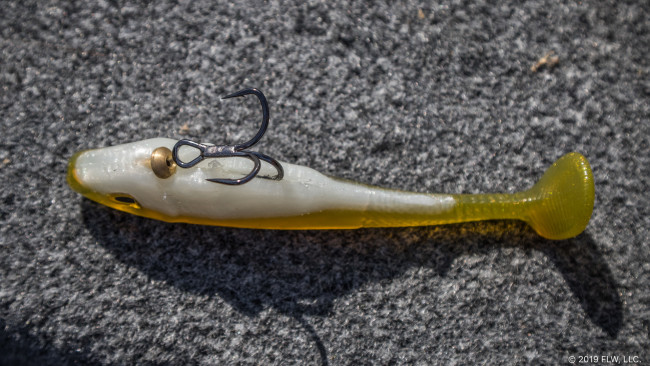
2. Use split rings or don’t – Lawrence used to use a split ring to attach the hook all the time. Now, he typically goes without it. It really depends on how the hook he’s using rests against the bait. When using a split ring to connect the hook, only the split ring or the hook eye can rest flat against the bait’s underside – not both. If the hook eye isn’t flat, the barbs might not line up properly. That’s why Lawrence goes with whichever connection method results in the most streamlined rigging for the bait and hook he’s using.
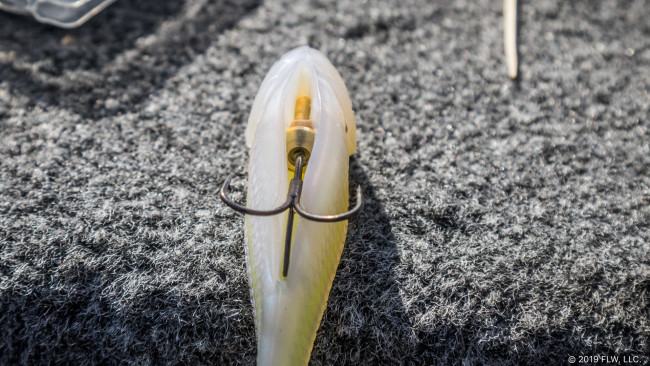
3. Position the hook correctly – The best way to extend the life of the swimbait is to position the hook so the knot is inside the Fattube and the hook eye (or split ring, if using one) is against the Fattube. This way, all the pulling pressure of the cast and retrieve is directed into the back of the tube.
“If you leave any gap between the split ring or hook and Fattube, when you cast, you’re putting all of that oomph of your cast into that hook bend,” Lawrence says. “You’ll tear the plastic, and the hook will move.”
However, Lawrence says you can actually tweak the running depth of the bait based on where you stick the hook. Going farther back by 1/8 inch or so will create a very slight back arch that helps the swimbait dig a little deeper. You can reverse the bend to fish shallower by adjusting where you insert the hook.
Lawrence advises to skin-hook the treble with the smallest amount of the hook as possible. He typically inserts it up to the point where the bend begins.
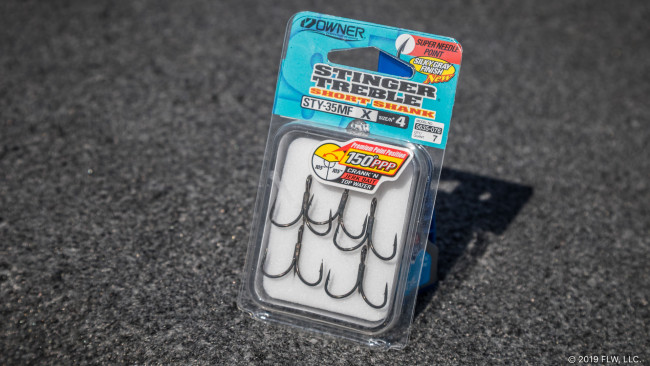
4. Choose the right hook – The right hook size depends on the size of the bait and the model you’re using. Lawrence typically uses 2X Gamakatsu treble hooks, but he recently discovered the Owner Stinger Treble Short Shank STY-35MF. On this hook, the points don’t radiate out at equal angles. The bottom two points stick out closer to 90 degrees from the top barb, so when rigged in the Booty Shaker’s belly the bottom points “hide” behind the side flaps, which helps to reduce snags. Lawrence used a No. 4 to rig the 4.0 Booty Shaker shown in this article.
5. Don’t be afraid to destroy some baits – According to Lawrence, you’ll probably booger up a bait or two as you’re dialing in the process. That’s OK. It’s just part of the process of dialing in the peculiarities of each swimbait. Also, always test a rigged bait in the water to make sure it’s tracking straight and not rolling to one side.
Tactics and presentations
In addition to limitations on depth, Lawrence also restricts himself to more or less only one presentation when using a line-thru.
“The one thing you do lose with the line-thru version is the ability to make the swimbait do anything different or really deviate very far from a standard slow wind,” he explains. “Why that is I can’t exactly explain. The standard, and almost always the only way I can get them to bite it, is just a slow, steady wind.”
The only variation he adds is to help trick followers into biting.
“About every 10 cranks or so I will make one very fast half-turn of the reel,” Lawrence says. “In this clear water, they will chase this bait, track it, and get right in behind and not bite it. If you make that swimbait do something just a little different, it can make them eat it. But as far as making any twitch of the rod tip or anything like that, it seems like they won’t bite it.”
Rods, reels and line
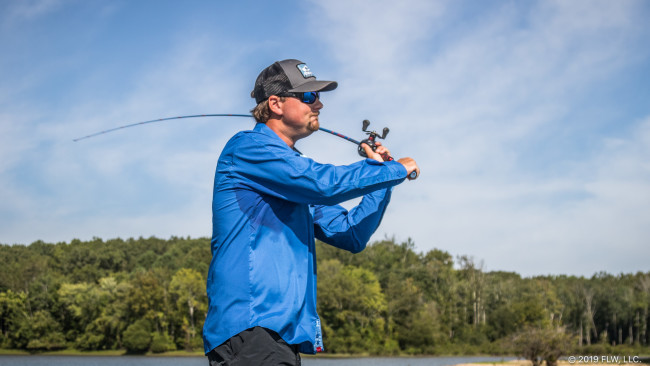
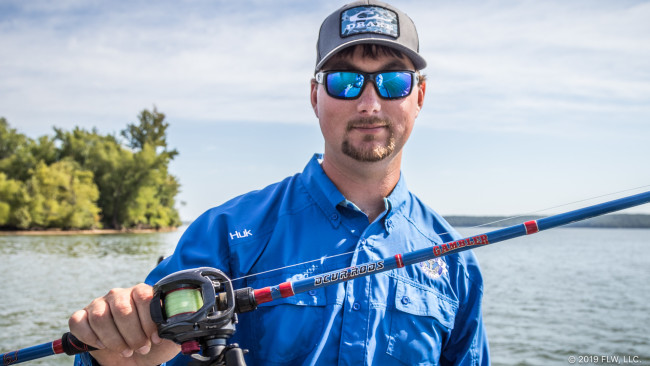
Lawrence throws most line-thrus on a medium-heavy, moderate-fast Jenko DCVR Gambler Series rod with a Daiwa Tatula 150 reel (6.3:1) and fluorocarbon line. Rod length can vary from 7-6 to 7-1. He says it’s not necessary to have a big swimbait “whuppin’ stick.” Like with any treble hook bait, the line-thru swimbait needs to be fished on a rod with enough tip action and forgiveness to not rip out the hooks. A hard hookset generally is unnecessary. For most situations, 15-pound-test line is fine, but Lawrence upgrades to 20- or 25-pound test in the fall to help keep the bait up in the water column on very shallow ledges.
Give it a shot
One of the great parts about Lawrence’s system is that you don’t have to stock a bunch of extra swimbaits to add line-thrus to your arsenal. You should already be carrying spare treble hooks and split rings. Just stock some Fattubes and toothpicks, learn to rig your favorite swimbaits you’re already carrying and you’ve just added another valuable tool to your arsenal.