My first attempt at pouring soft-plastic baits was in 2005, when I ordered a basic worm-making kit from an online retailer. The description on that kit read “This kit is for the beginner or hobbyist who wants to produce a limited amount of worms for personal use,” which was perfect for me.
The only problem was that this was before the days of YouTube how-to videos and helpful websites like TackleUnderground.com, and I didn’t know what I was doing. The day the kit arrived, without any helpful resources, I broke it open, skimmed the directions and promptly burned the first pan of plastisol in my parents’ kitchen. I think I managed to pour five shaky worms successfully. Then the box went into a closet and didn’t emerge again until spring of 2012.
By that point, I was living on my own, and came across an article on soft-plastic bait-making in a magazine, which reignited my interest. I dug up the kit, found an old used microwave, bought a Pyrex measuring cup, a pair of heat-resistant gloves and a few painting facemasks, and was ready to give it another try, this time with better equipment and some more information. With the help of that article and some online resources, my experience the second time was much more enjoyable.
While I still consider myself a novice, I’ve learned a lot since then. I’ve also learned that you can get lost down a rabbit hole by doing too much online research. So, this article is intended to give you the basic understanding of how to pour swimbaits, because I want other people to experience the same joy I do when a bass smashes a bait that you poured yourself.
Safety 101
First, and most importantly, follow all safety directions provided by the manufacturer of the products you choose to use. Wear all the recommended personal protective equipment, including gloves, a respirator, glasses, long sleeves, pants and sneakers. Never let water or moisture come in contact with hot plastisol. Moisture will turn to steam immediately when it contacts the plastisol, which can cause it to spew in all directions. Always pour in a well-ventilated area like a garage, with the doors and windows open. Use a fan to blow the fumes away from your workspace. And keep children out of the work area.
What you need
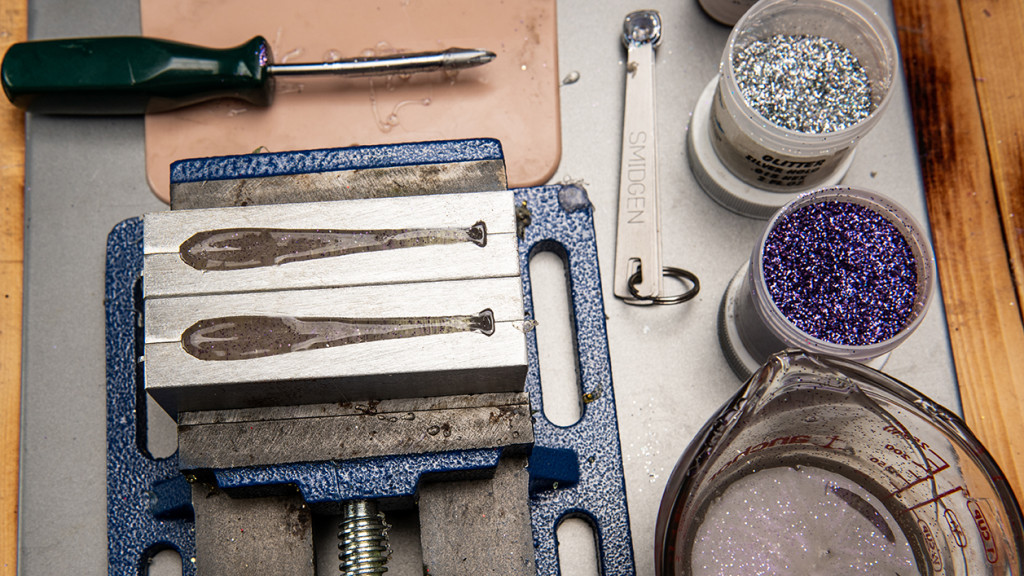
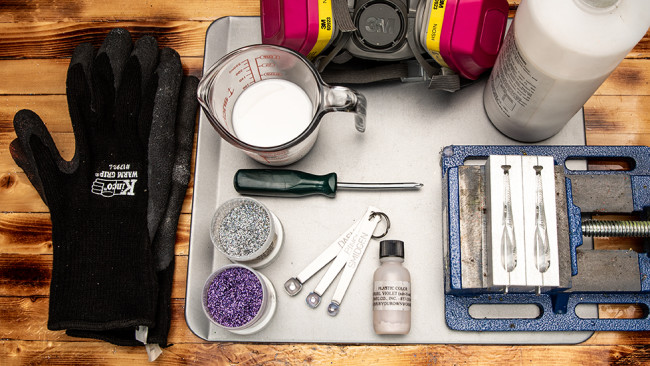
My first kit came with a silicone hand-pour variety mold, 2 pints of plastisol, three 1-ounce bottles of colorant, 1 ounce of scent, two special pouring pans, a color wheel mixing guide and instructions. I’ve added to my equipment since then and have been able to boil it down to the bare minimum of what you need to get started.
1. Microwave – I prefer to use a microwave to melt the plastisol. It’s just easy.
2. Pouring cup – A Pyrex measuring cup works best.
3. Mixer – A screwdriver works fine (the one I use was left in my car after someone broke into it).
4. Molds – I used the BTS Molds 637 open-pour 3 1/2-inch swimbait mold for this article, but there are others out there. I started with open-pour molds because it’s a quick, easy way to get going. You can also find injection molds, which would require investing in an injector.
5. Liquid plastic (plastisol) – You can buy it at Tackle Warehouse here. I suggest buying 1 pint to start. That’s enough to make about 35 3 1/2-inch swimbaits.
6. Plastic colorant – The Do-It Essential Series Colorants work well.
7. Glitter – Do-It also makes Essential Series Glitter.
More optional gear – Some other useful but not essential pieces of equipment you might keep on hand are measuring spoons, baking sheets, a logbook or journal, and an infrared thermometer. You’ll see the thermometer used in one of the reference photos. I purchased it because I was having a hard time with laminate pours and wanted to know the temp when I was pouring, but it’s not required for basic pours.
Get started pouring
Make sure you have a clean, organized workspace. You’ll be working with hot (325 to 350 degree) liquid. I prefer working over a baking sheet, because any plastic that spills on it will peel off and can be reused. Lay out all the equipment you need before starting.
Here are the steps to follow:
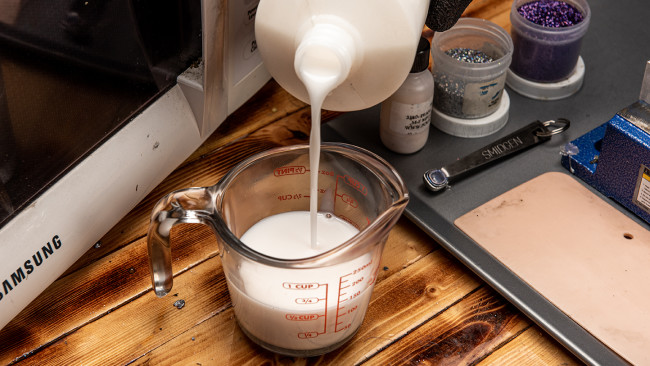
1. Measure out the right amount of plastisol. For this pour, 1/2 cup made eight 3 1/2-inch swimbaits. Depending on the size/number of molds you’re pouring, you might need more. Mold manufacturers and online resources can help with some guidance, but experimentation is sometimes needed. I typically use less when I’m trying a new color, so I don’t waste it if I wind up not liking the end result. Just remember that you will need to increase the amount of colorant and glitter to match the increase in plastisol.
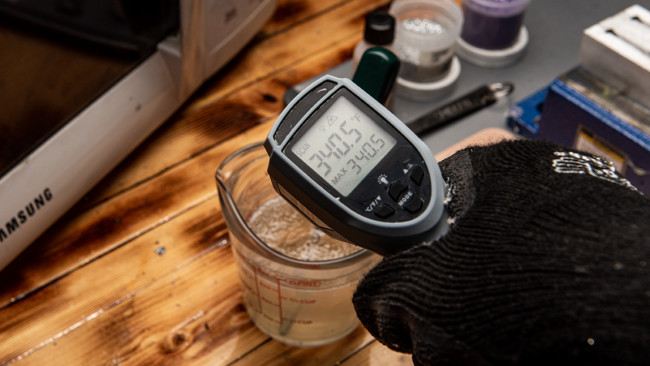
2. Heat the plastisol. Here’s the heating protocol I follow: 1) Heat the plastisol in the microwave for 1 minute, 2) stir, 3) microwave for 30 seconds, 4) stir, 5) microwave 30 seconds and 6) stir.
By this point it should be very close to the 325- to 350-degree mark. Plastisol goes through three different stages: 1) liquid, 2) cloudy/lumpy and 3) crystal clear/silky smooth. The last point occurs around 340 degrees. An infrared thermometer makes it easy to see when the plastisol has reached the correct temperature, but even without it, you can tell it’s ready for the next step when it turns crystal clear.
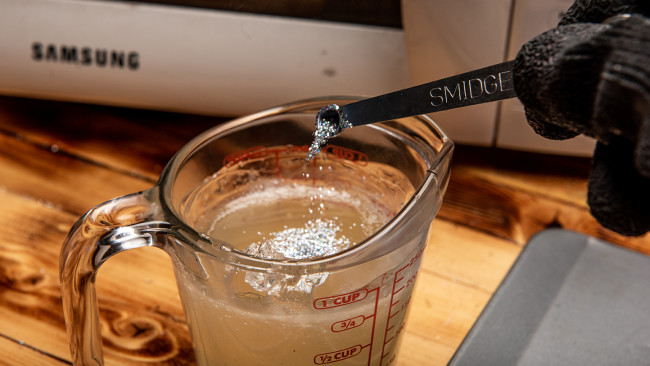
3. Add colorant and glitter, then stir. Start by stirring in one drop at a time. Some colors are stronger than others, and you never want to add too much. You can always make the color darker, but you can never make it lighter. As for glitter, the same rule applies. After a few pours, you’ll start to dial in how much of both to use for the look you’re after.
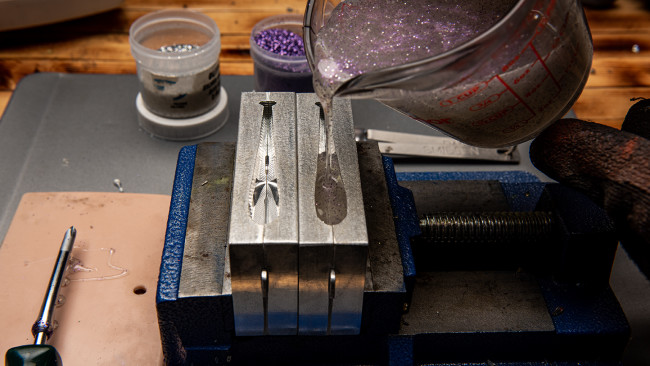
4. Caution: Extremely Hot! Slowly pour plastic into the mold. Start at the top, and fill slowly, working back toward the tail. Slightly overfill the mold because the plastic shrinks as it cools.
Tip: If you live where it’s cold, like I do in Buffalo, it’s not a bad idea to preheat the mold before pouring during the cooler seasons. I do it from the fall through spring using a toaster over. “Cold cracking” can occur in baits when they’re poured into a cold mold, at least until the mold warms up.

5. Allow the bait to cool for at least five minutes. Let it cool 10 to 15 minutes if you pre-heated your aluminum mold.
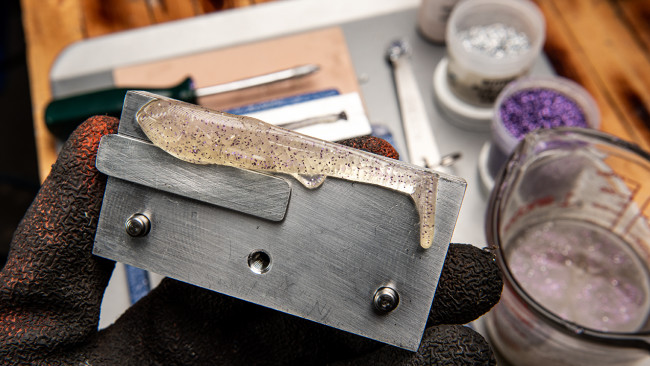
6. Open the mold to remove the swimbait.

7. Place baits flat side down on the baking sheet to cure overnight.
8. The swimbait is now ready to fish.
A few tips
– Keep your plastisol well mixed.
– Save scraps and any old baits (baits you made or bought) because they can be re-melted. Scraps also include the leftover material in your pouring cup. It will peel right out and can be reused in other pours.
– Start light when adding colorant. You can always go darker.
– Heat the plastisol slowly until you get a feel for the process. Overheated plastisol will scorch, turn yellow and become unusable.
– You will need to reheat during long pours. It is safe to do so even with glitter and color already added. Just be sure to do it in short increments, 15 to 30 seconds at a time. Be sure to stir each time, which will help prevent scorching.
Give it a try
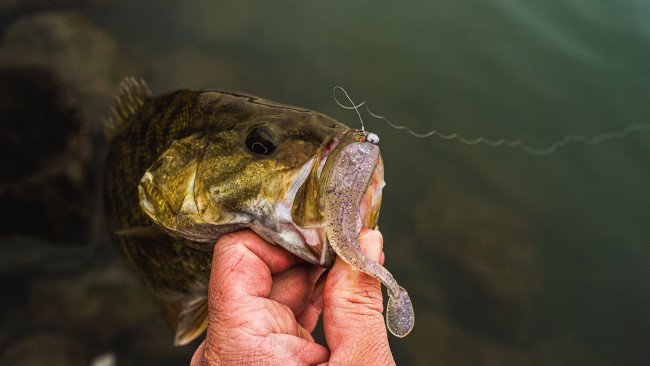
I hope this helps you get started making baits. There is nothing like catching a fish on a bait you made yourself. Be sure to follow all safety instructions, as heated plastisol can burn skin very quickly and is very painful. If you have any questions, feel free to DM me on instagram @fishshots_charleswaldorf, and I will help the best I can.